ComfyUI | How to Implement Clay Style Filters
This guide will introduce you to deploying Stable Diffusion's Comfy UI on LooPIN with a single click, and to the initial experiences with the clay style filter. Comfy UI employs a node-based operational approach, offering enhanced control, easier replication, and fine-tuning of the output results, and allows for the customization of personalized workflows upon mastery.
🔥NEW🔥 If you want to try it first, go to our interactive demo: 👉🏻 Clay Style Demo
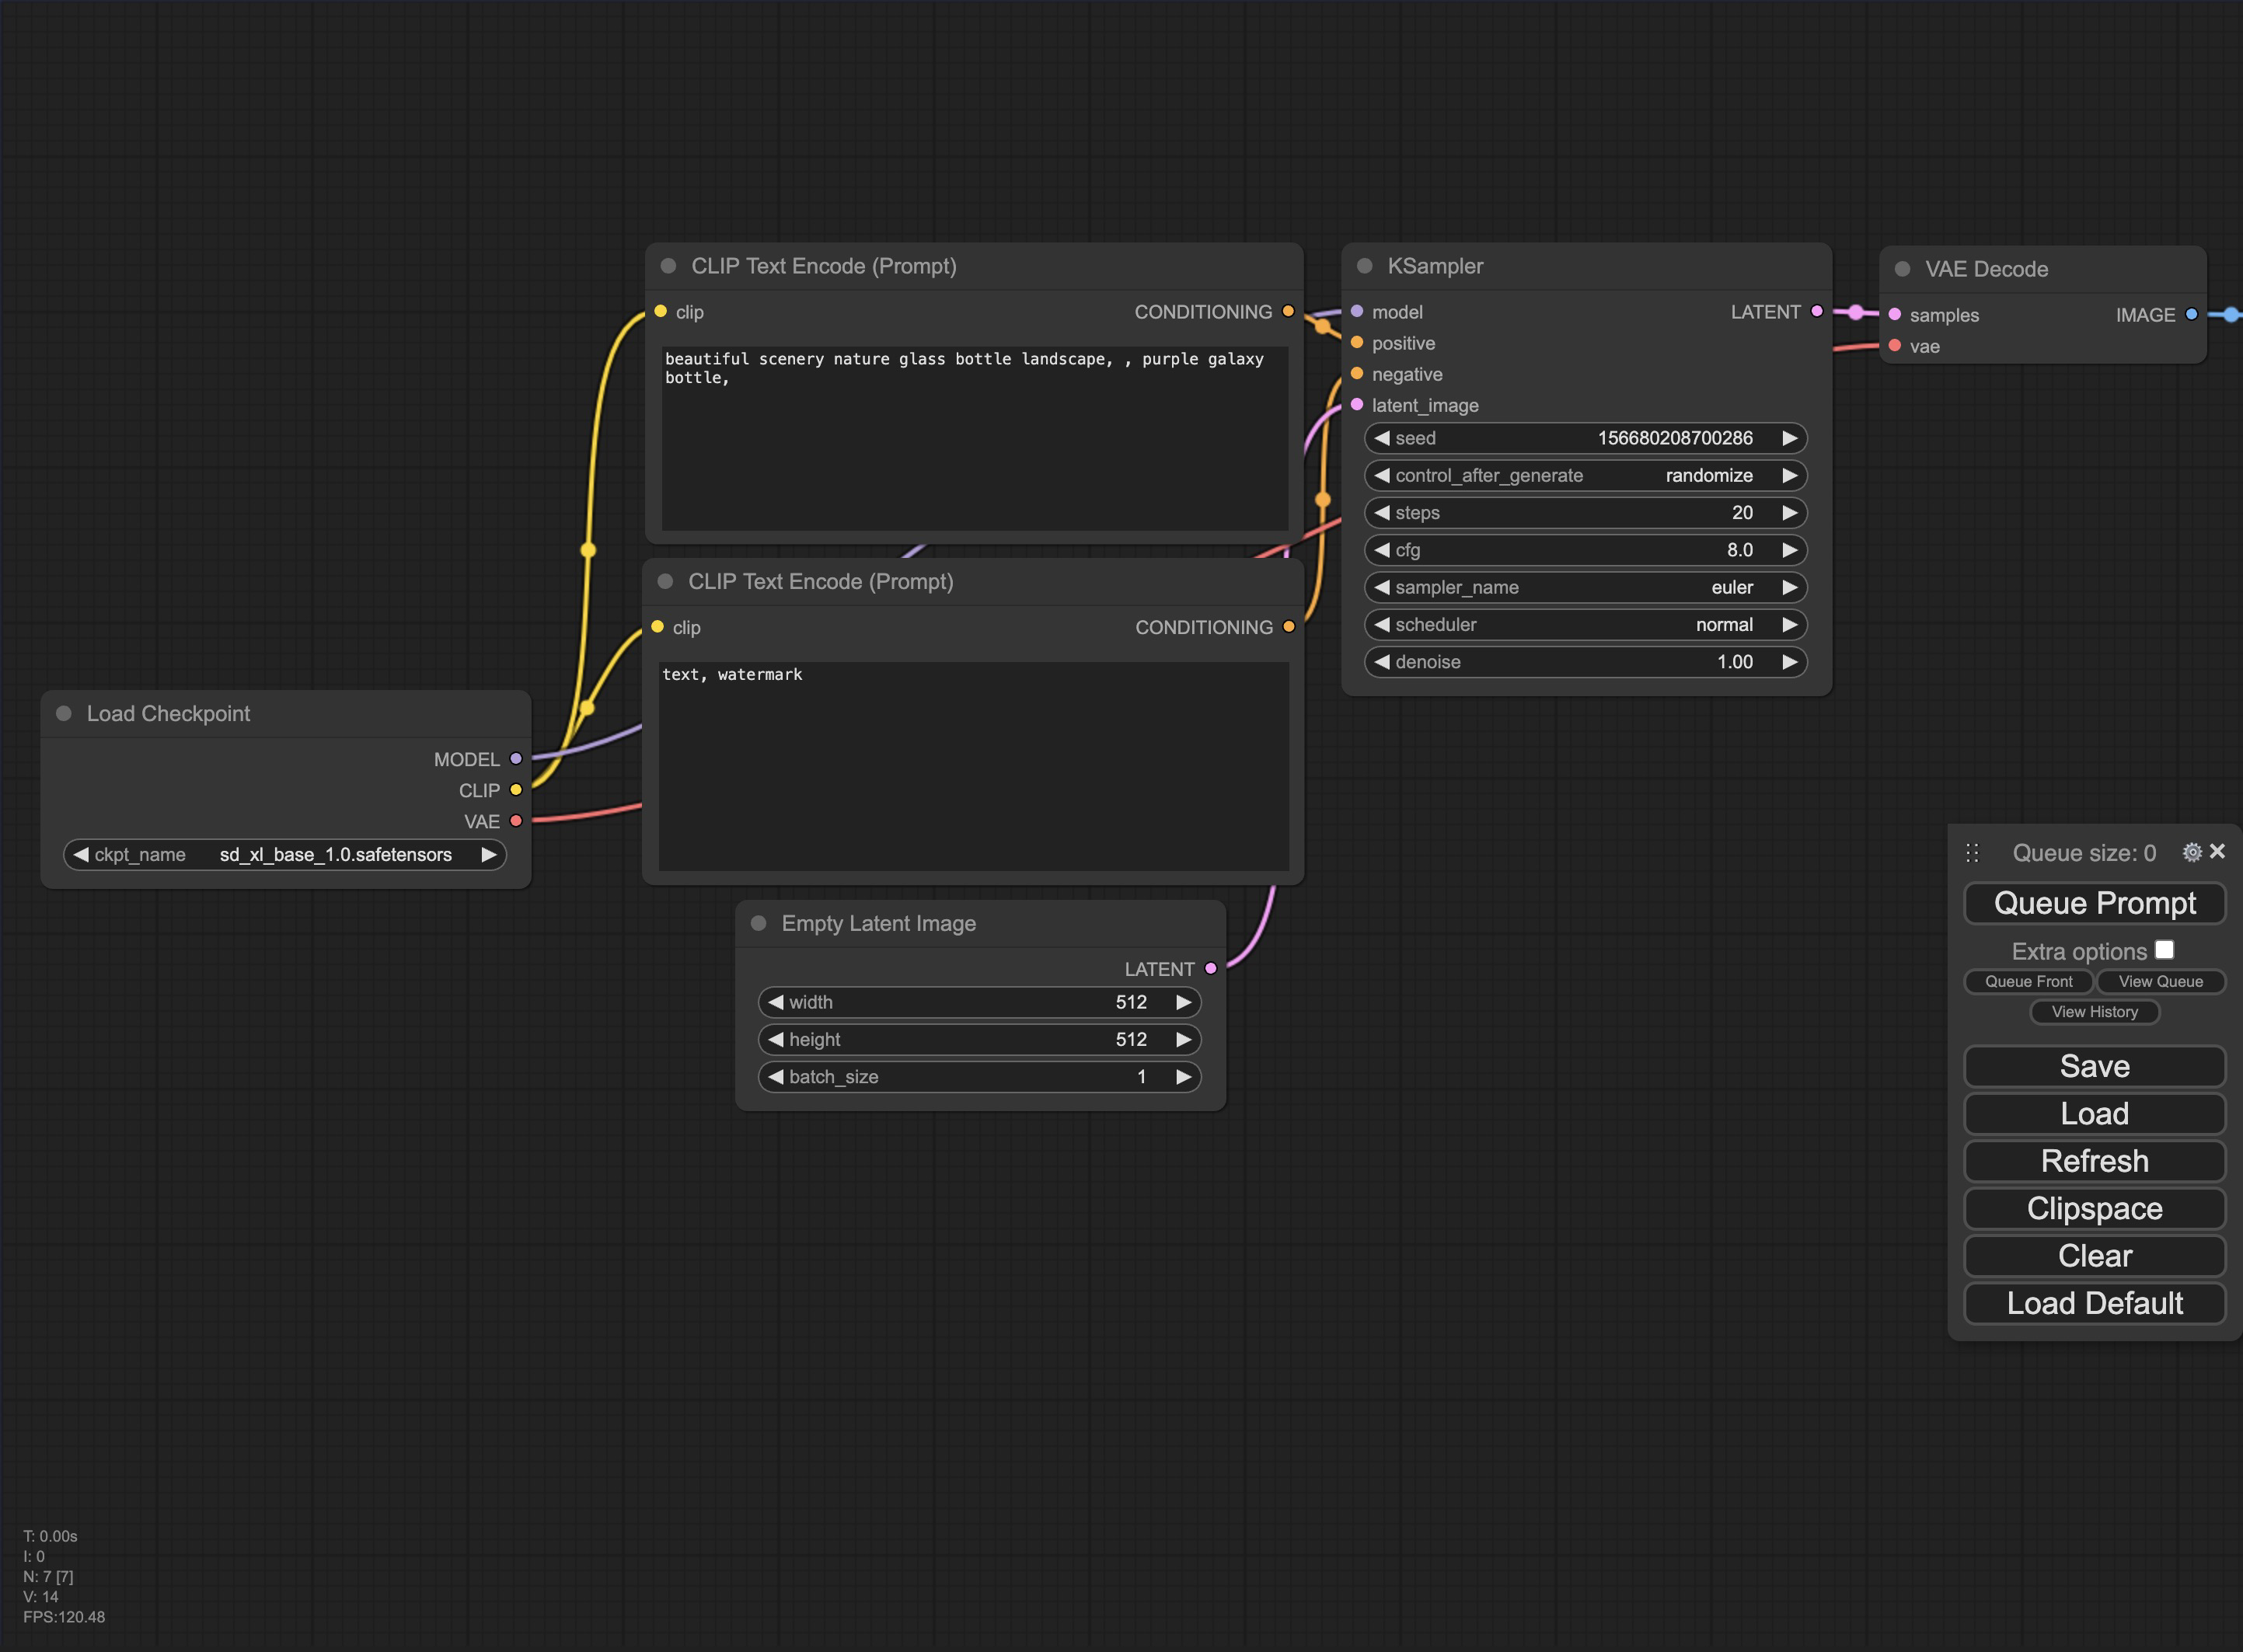
Introduction to ComfyUI
Comfy UI utilizes a node-based operation approach. It offers better support for the Stable Diffusion XL 1.0 model compared to other WebUIs, allowing visible workflow integration of different models (such as the Base model and the Refiner model). This node-based approach increases controllability, facilitating replication and fine-tuning of output results, and enabling the customization of personalized workflows after proficiency is attained.
Installation of ComfyUI Nodes
Configuring GPU Instances
For detailed interactive guidance, please visit the following page: LooPIN Liquidity Pool
1. LooPIN Liquidity Pool:
Navigate to LooPIN's liquidity pool (LooPIN Network Pool), and use $LOOPIN tokens to purchase GPU time. As an example, select the appropriate GPU model based on your requirements and budget from GPU UserBenchmark.
2. Token Exchange for GPU Resources:
- Select the necessary quantity of $LOOPIN tokens.
- Adjust the slider to choose the number of GPUs.
- Confirm the exchange amount and finalize the transaction.
3. Accessing Jupyter Notebook:
Following a successful transaction, access the Jupyter Notebook via your remote server under Rented Servers and Server. Usually, the instance is ready within 2-4 minutes.
4. Verifying GPU Activation:
Within the Jupyter Notebook, launch a new terminal window, execute the nvidia-smi command, and verify if the GPU is active.
+-----------------------------------------------------------------------------------------+
| NVIDIA-SMI 550.54.15              Driver Version: 550.54.15      CUDA Version: 12.4     |
|-----------------------------------------+------------------------+----------------------+
| GPU  Name                 Persistence-M | Bus-Id          Disp.A | Volatile Uncorr. ECC |
| Fan  Temp   Perf          Pwr:Usage/Cap |           Memory-Usage | GPU-Util  Compute M. |
|                                         |                        |               MIG M. |
|=========================================+========================+======================|
|   0  NVIDIA GeForce RTX 3080        Off |   00000000:01:00.0 Off |                  N/A |
|  0%   39C    P8             21W /  350W |      12MiB /  12288MiB |      0%      Default |
|                                         |                        |                  N/A |
+-----------------------------------------+------------------------+----------------------+

+-----------------------------------------------------------------------------------------+
| Processes:                                                                              |
|  GPU   GI   CI        PID   Type   Process name                              GPU Memory |
|        ID   ID                                                               Usage      |
|=========================================================================================|
+-----------------------------------------------------------------------------------------+
Installation Process for ComfyUI
- Install the
Comfy UIGitHub package:
git clone https://github.com/comfyanonymous/ComfyUI.git && cd ComfyUI
- Install Python dependencies:
pip install xformers!=0.0.18 -r requirements.txt --extra-index-url https://download.pytorch.org/whl/cu121 --extra-index-url https://download.pytorch.org/whl/cu118 --extra-index-url https://download.pytorch.org/whl/cu117
- Install
ComfyUI-Manager, an extension designed to enhanceComfy UIuser experiences. It includes management functions for installing, removing, disabling, and enablingComfy UI's various custom nodes.
cd /workspace/ComfyUI/custom_nodes
git clone https://github.com/ltdrdata/ComfyUI-Manager.git
- Download and install the Cloudflare tunnel:
wget https://github.com/cloudflare/cloudflared/releases/latest/download/cloudflared-linux-amd64.deb
dpkg -i cloudflared-linux-amd64.deb
- Create a new
Jupyter NotebookinComfy UI, and expose the port usingCloudflare. Await the output of the internal network penetration link fromCloudflare.
import subprocess
import threading
import time
import socket
import urllib.request

def iframe_thread(port):
  while True:
      time.sleep(0.5)
      sock = socket.socket(socket.AF_INET, socket.SOCK_STREAM)
      result = sock.connect_ex(('127.0.0.1', port))
      if result == 0:
        break
      sock.close()
  print("\nComfyUI finished loading, trying to launch cloudflared (if it gets stuck here cloudflared is having issues)\n")

  p = subprocess.Popen(["cloudflared", "tunnel", "--url", "http://127.0.0.1:{}".format(port)], stdout=subprocess.PIPE, stderr=subprocess.PIPE)
  for line in p.stderr:
    l = line.decode()
    if "trycloudflare.com " in l:
      print("This is the URL to access ComfyUI:", l[l.find("http"):], end='')
    #print(l, end='')


threading.Thread(target=iframe_thread, daemon=True, args=(8188,)).start()

!python main.py --dont-print-server
xformers version: 0.0.26.post1+cu118
Set vram state to: NORMAL_VRAM
Device: cuda:0 NVIDIA GeForce RTX 3080 : cudaMallocAsync
VAE dtype: torch.bfloat16
Using pytorch cross attention
****** User settings have been changed to be stored on the server instead of browser storage. ******
****** For multi-user setups add the --multi-user CLI argument to enable multiple user profiles. ******

Import times for custom nodes:
   0.0 seconds: /workspace/ComfyUI/custom_nodes/websocket_image_save.py


ComfyUI finished loading, trying to launch cloudflared (if it gets stuck here cloudflared is having issues)

This is the URL to access ComfyUI: https://inside-isa-myrtle-guardian.trycloudflare.com
Click on the following link to access ComfyUI: https://inside-isa-myrtle-guardian.trycloudflare.com. If it fails to load initially, please allow 1-2 minutes.
Clay Style Workflow Installation
- Loading the Clay Style Workflow:
Utilize the XIONGMU open-source Comfy UI workflow from (https://openart.ai/workflows/xiongmu/image-to-clay-style/KRjSiOFyPSHO5QCQ4raV) and select Load in Comfy UI after downloading.
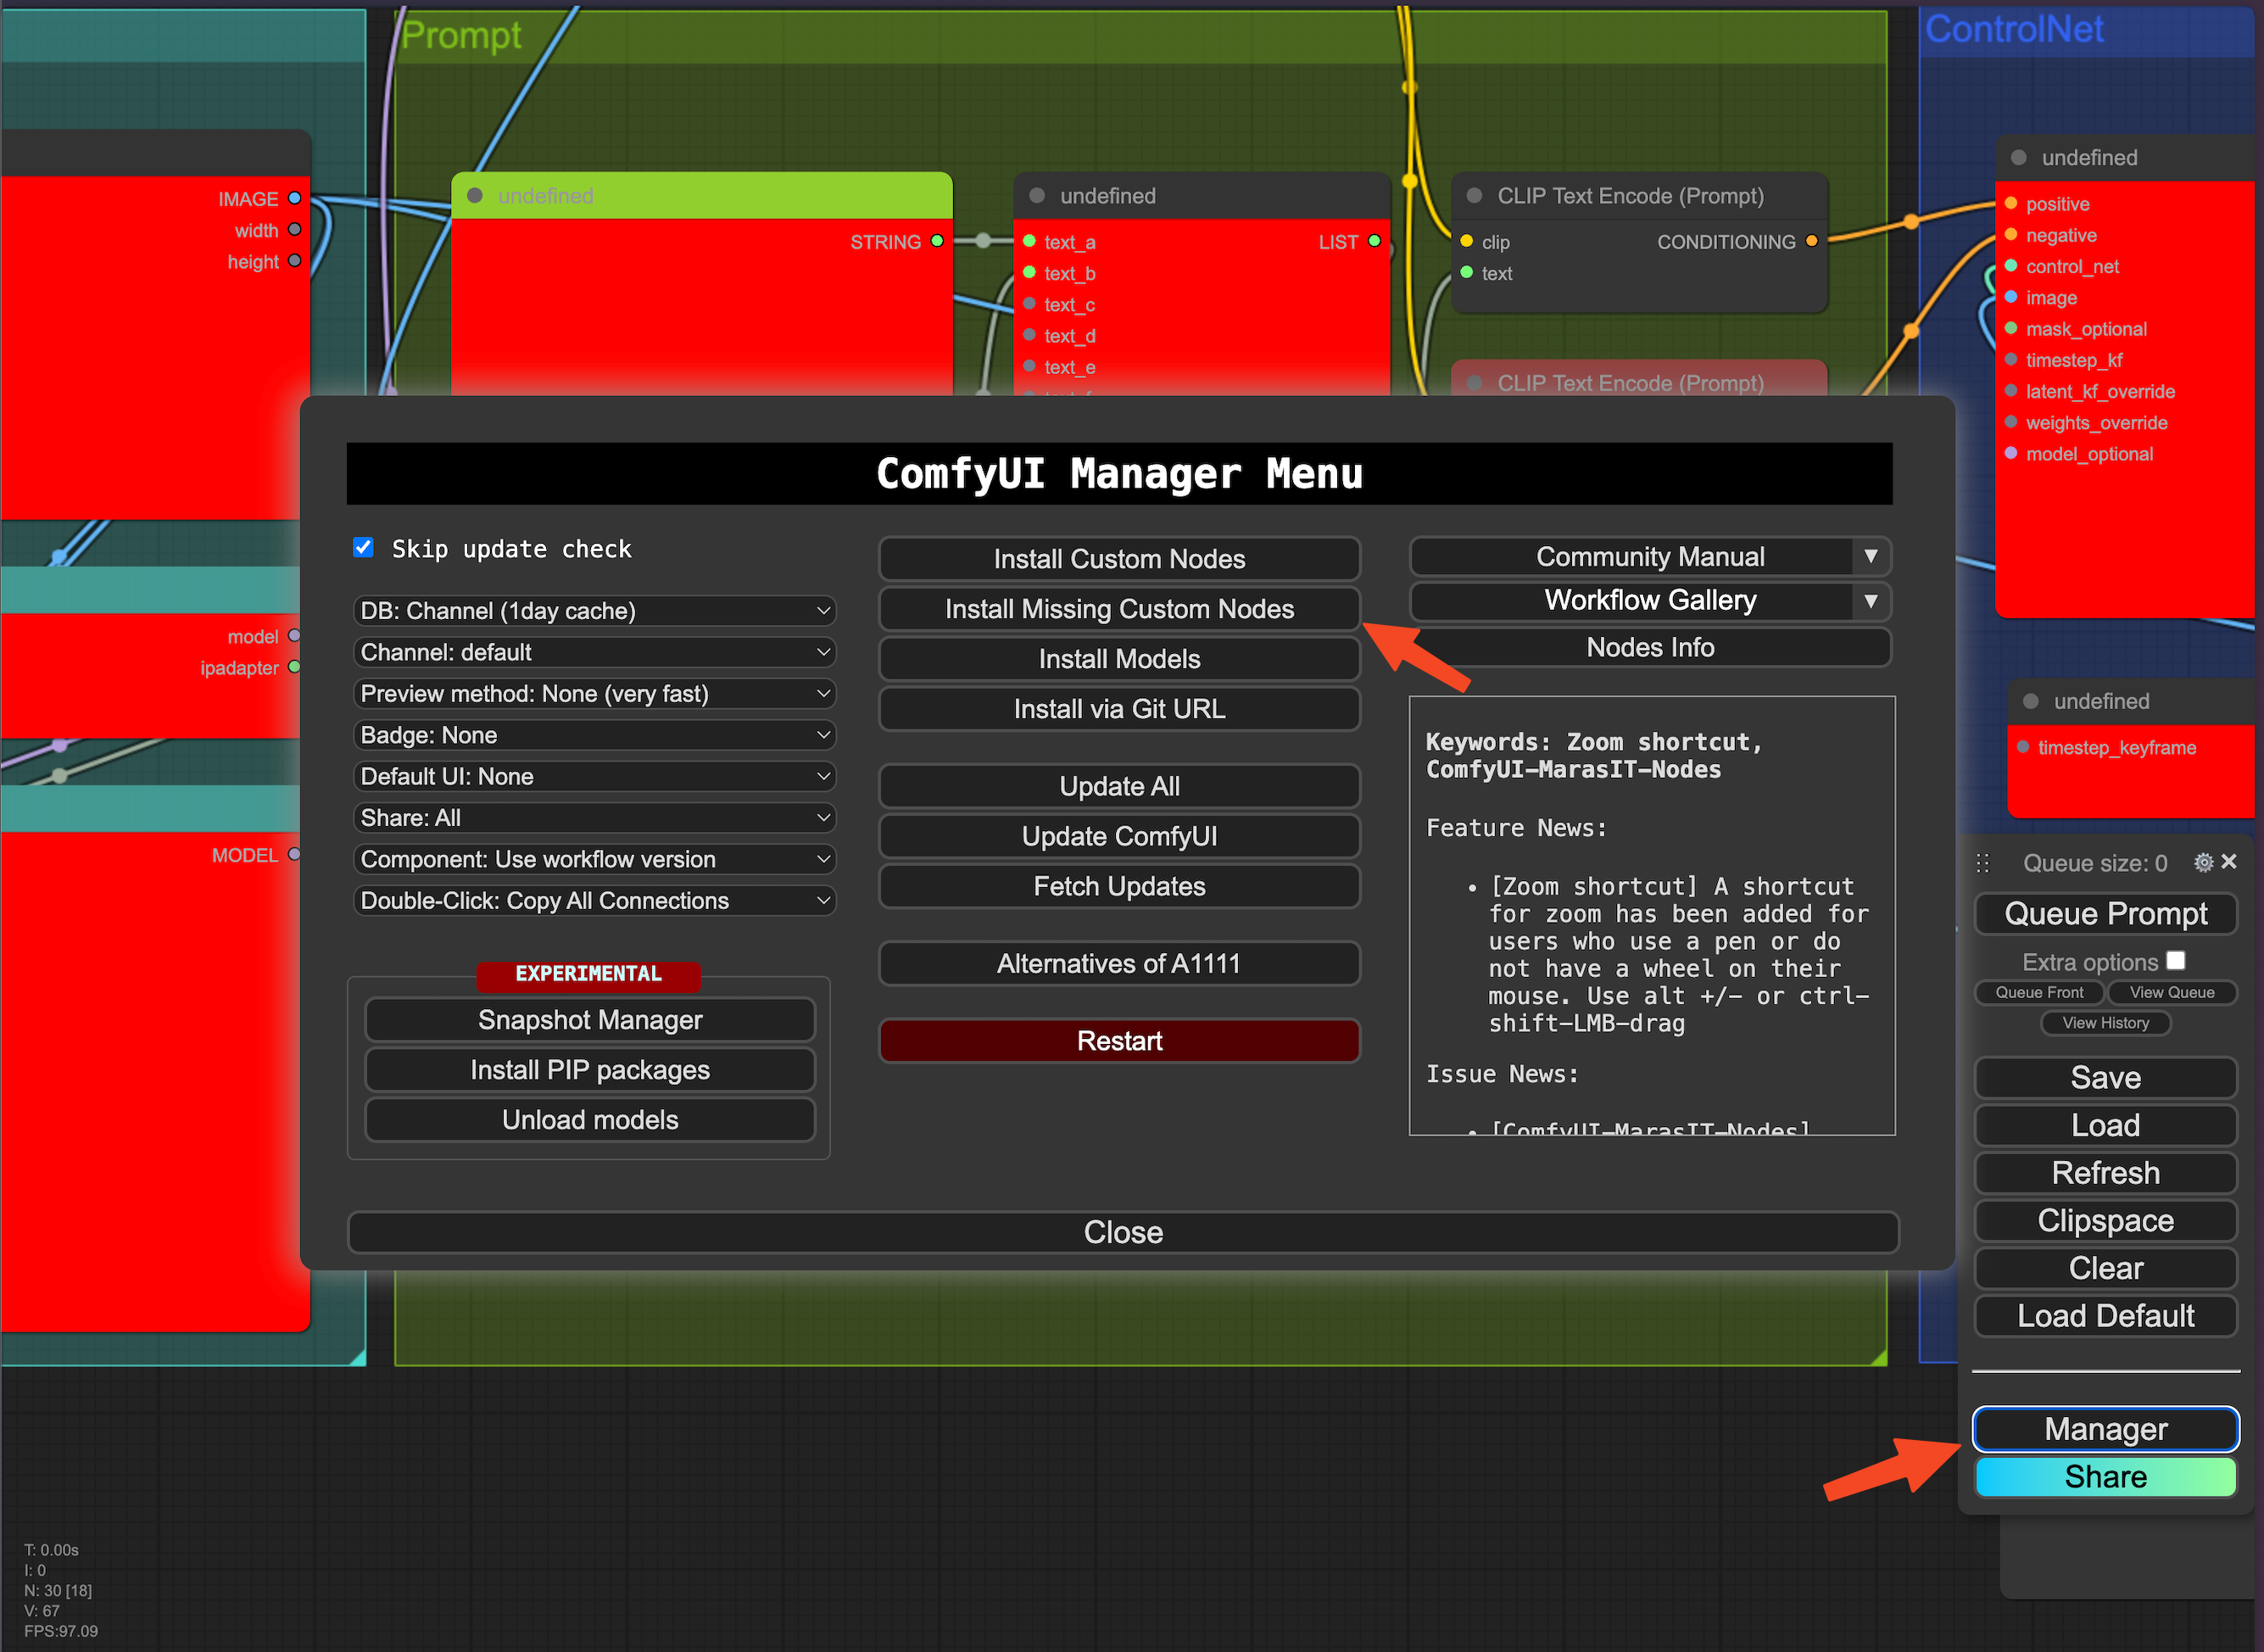
If errors occur due to uninstalled nodes, open the Manager at the bottom right, click Install Missing Custom Nodes, and then install each node one by one (this tutorial involves 11 custom nodes). After installation, clicking restart will reboot Comfy UI.
- Downloading the
CheckpointBase Model:
Use the following URL for the base model: https://huggingface.co/RunDiffusion/Juggernaut-XL-v9/resolve/main/Juggernaut-XL_v9_RunDiffusionPhoto_v2.safetensors?download=true.
Chinese users should replace
https://huggingface.cowithhttps://hf-mirror.com/.
wget https://huggingface.co/RunDiffusion/Juggernaut-XL-v9/resolve/main/Juggernaut-XL_v9_RunDiffusionPhoto_v2.safetensors -O /workspace/ComfyUI/models/checkpoints/Juggernaut-XL_v9_RunDiffusionPhoto_v2.safetensors
- Downloading the
LoraModels:
LoRA is a fine-tuning technique for diffusion models that makes minor modifications to the standard checkpoint model, greatly reducing its size. We require two types of Loras for enhancing the base model to produce stylized images.
CLAYMATE - Claymation Style for SDXL
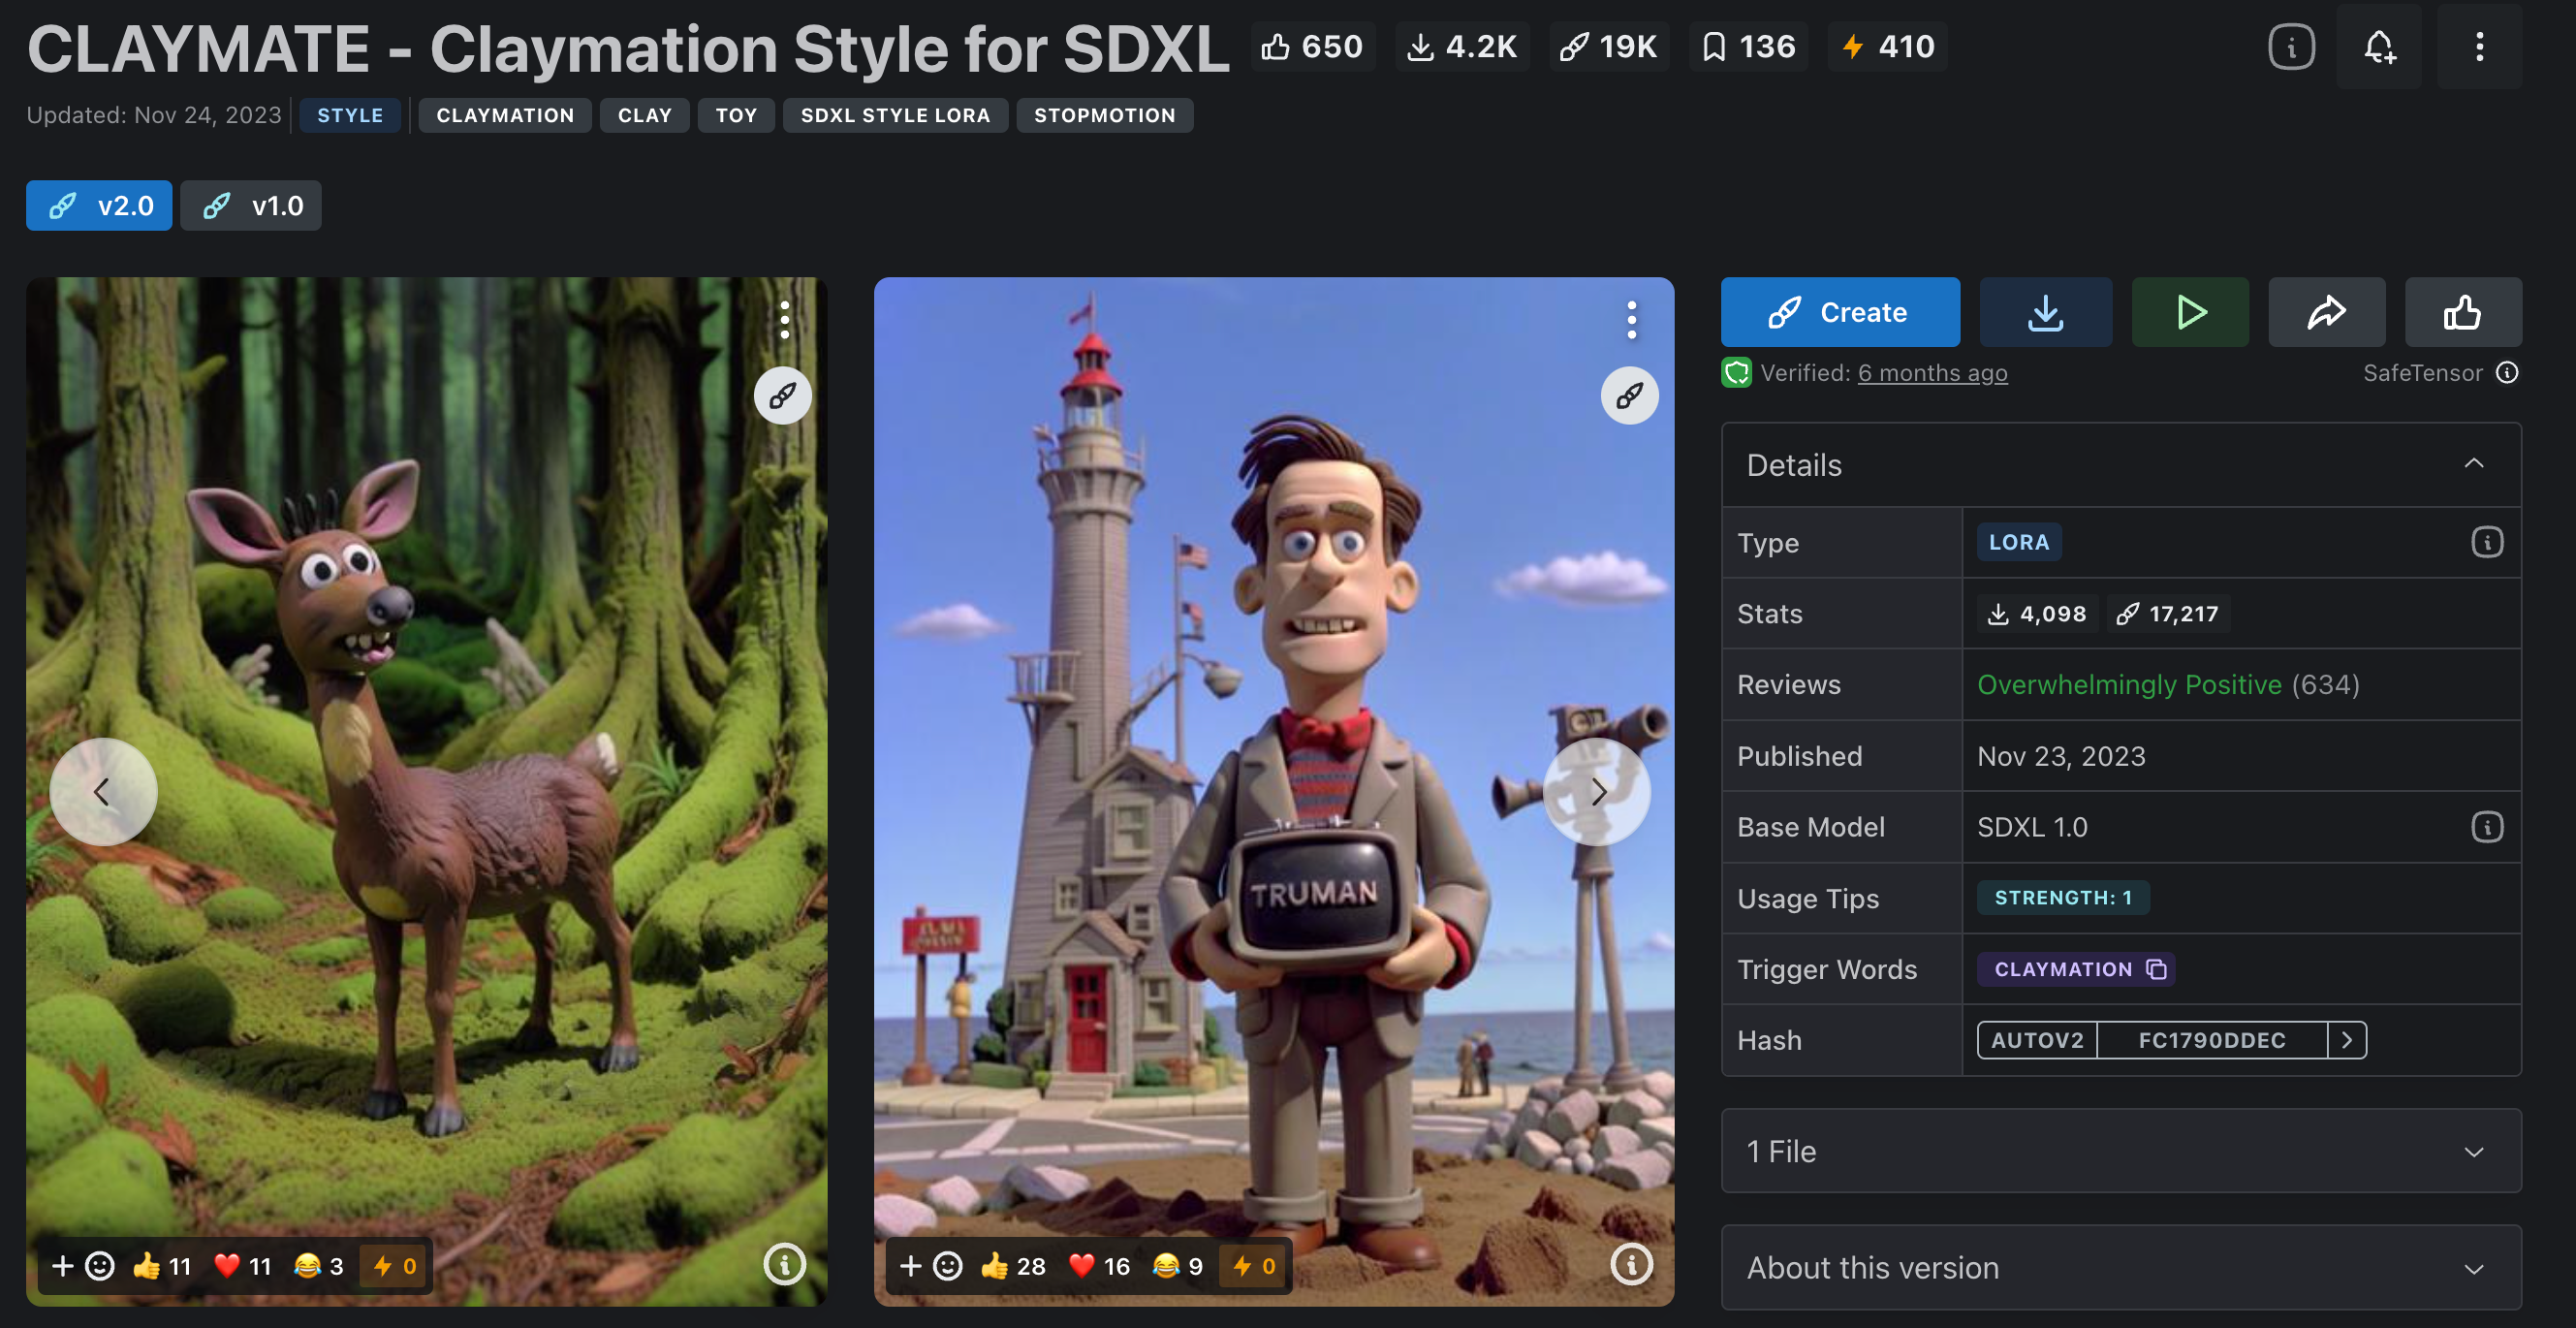
Available from: https://civitai.com/models/208168/claymate-claymation-style-for-sdxl.
Doctor Diffusion's Claymation Style LoRA
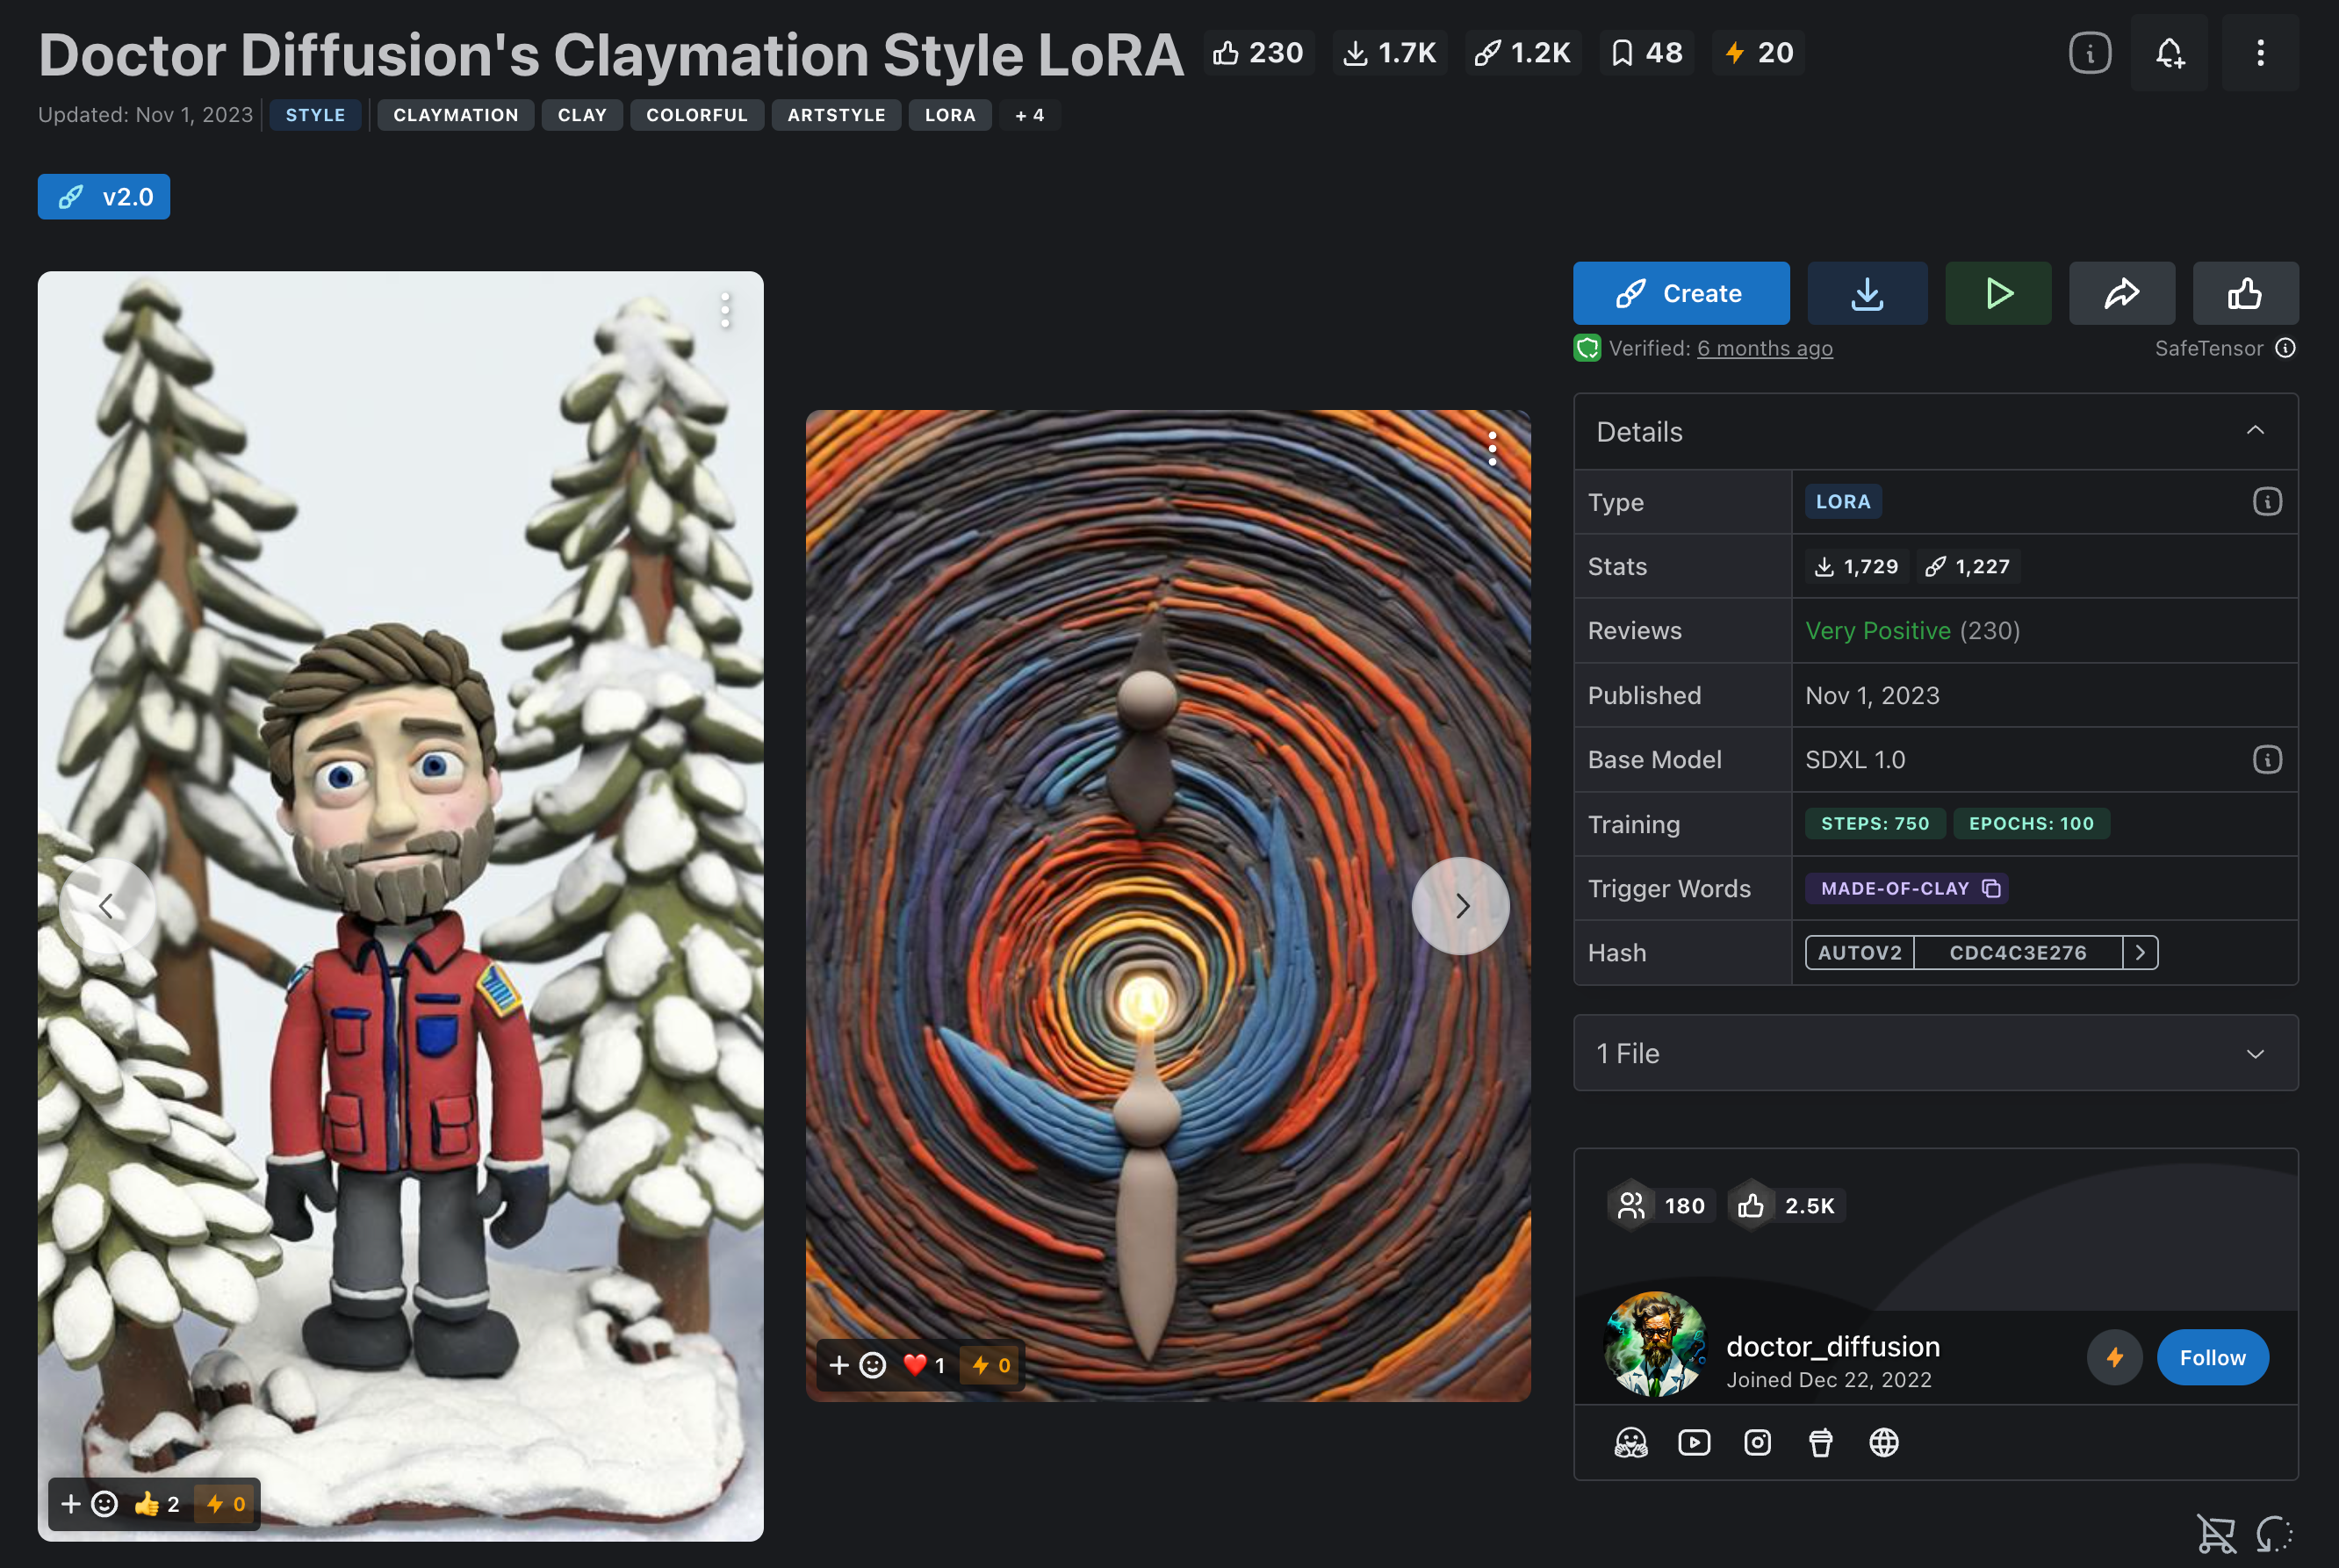
Available from: https://civitai.com/models/181962/doctor-diffusions-claymation-style-lora.
For one-click downloads (free mirror acceleration is provided on the LooPIN network):
wget -c https://files.loopin.network/docs/tutorials/comfyui/DD-made-of-clay-XL-v2.safetensors -O /workspace/ComfyUI/models/loras/DD-made-of-clay-XL-v2.safetensors
wget -c https://files.loopin.network/docs/tutorials/comfyui/CLAYMATE_V2.03_.safetensors -O /workspace/ComfyUI/models/loras/CLAYMATE_V2.03_.safetensors
- Downloading the Controlnet Model:
ControlNet enhances the controllability and precision of AI-generated images by guiding Stable Diffusion based on the creator's ideas with additional control conditions.
Chinese users should replace
https://huggingface.cowithhttps://hf-mirror.com/.
wget https://huggingface.co/stabilityai/control-lora/resolve/main/control-LoRAs-rank256/control-lora-canny-rank256.safetensors -O /workspace/ComfyUI/models/controlnet/sai_xl_canny_256lora.safetensors
- Downloading the IPAdapter Model:
IPAdapter allows for style transfer with just a single image and supports multi-feature extraction from multiple images. It can also connect to dynamic prompt matrices and controlnet, among other features, marking a new era in "underlaying" techniques.
Chinese users should replace
https://huggingface.cowithhttps://hf-mirror.com/.
mkdir /workspace/ComfyUI/models/ipadapter
wget https://huggingface.co/h94/IP-Adapter/resolve/main/sdxl_models/ip-adapter_sdxl_vit-h.safetensors -O /workspace/ComfyUI/models/ipadapter/ip-adapter_sdxl_vit-h.safetensors
wget https://huggingface.co/h94/IP-Adapter/resolve/main/sdxl_models/ip-adapter-plus_sdxl_vit-h.safetensors -O /workspace/ComfyUI/models/ipadapter/ip-adapter-plus_sdxl_vit-h.safetensors
wget https://huggingface.co/h94/IP-Adapter/resolve/main/sdxl_models/ip-adapter-plus-face_sdxl_vit-h.safetensors -O /workspace/ComfyUI/models/ipadapter/ip-adapter-plus-face_sdxl_vit-h.safetensors
wget https://huggingface.co/h94/IP-Adapter/resolve/main/sdxl_models/ip-adapter_sdxl.safetensors -O /workspace/ComfyUI/models/ipadapter/ip-adapter_sdxl.safetensors
- Downloading the ClipVision Model:
Chinese users should replace
https://huggingface.cowithhttps://hf-mirror.com/.
wget https://huggingface.co/h94/IP-Adapter/resolve/main/models/image_encoder/model.safetensors -O /workspace/ComfyUI/models/clip_vision/CLIP-ViT-H-14-laion2B-s32B-b79K.safetensors
wget https://huggingface.co/h94/IP-Adapter/resolve/main/sdxl_models/image_encoder/model.safetensors -O /workspace/ComfyUI/models/clip_vision/CLIP-ViT-bigG-14-laion2B-39B-b160k.safetensors
Once installation is completed, use the Manager to Restart and reboot ComfyUI.
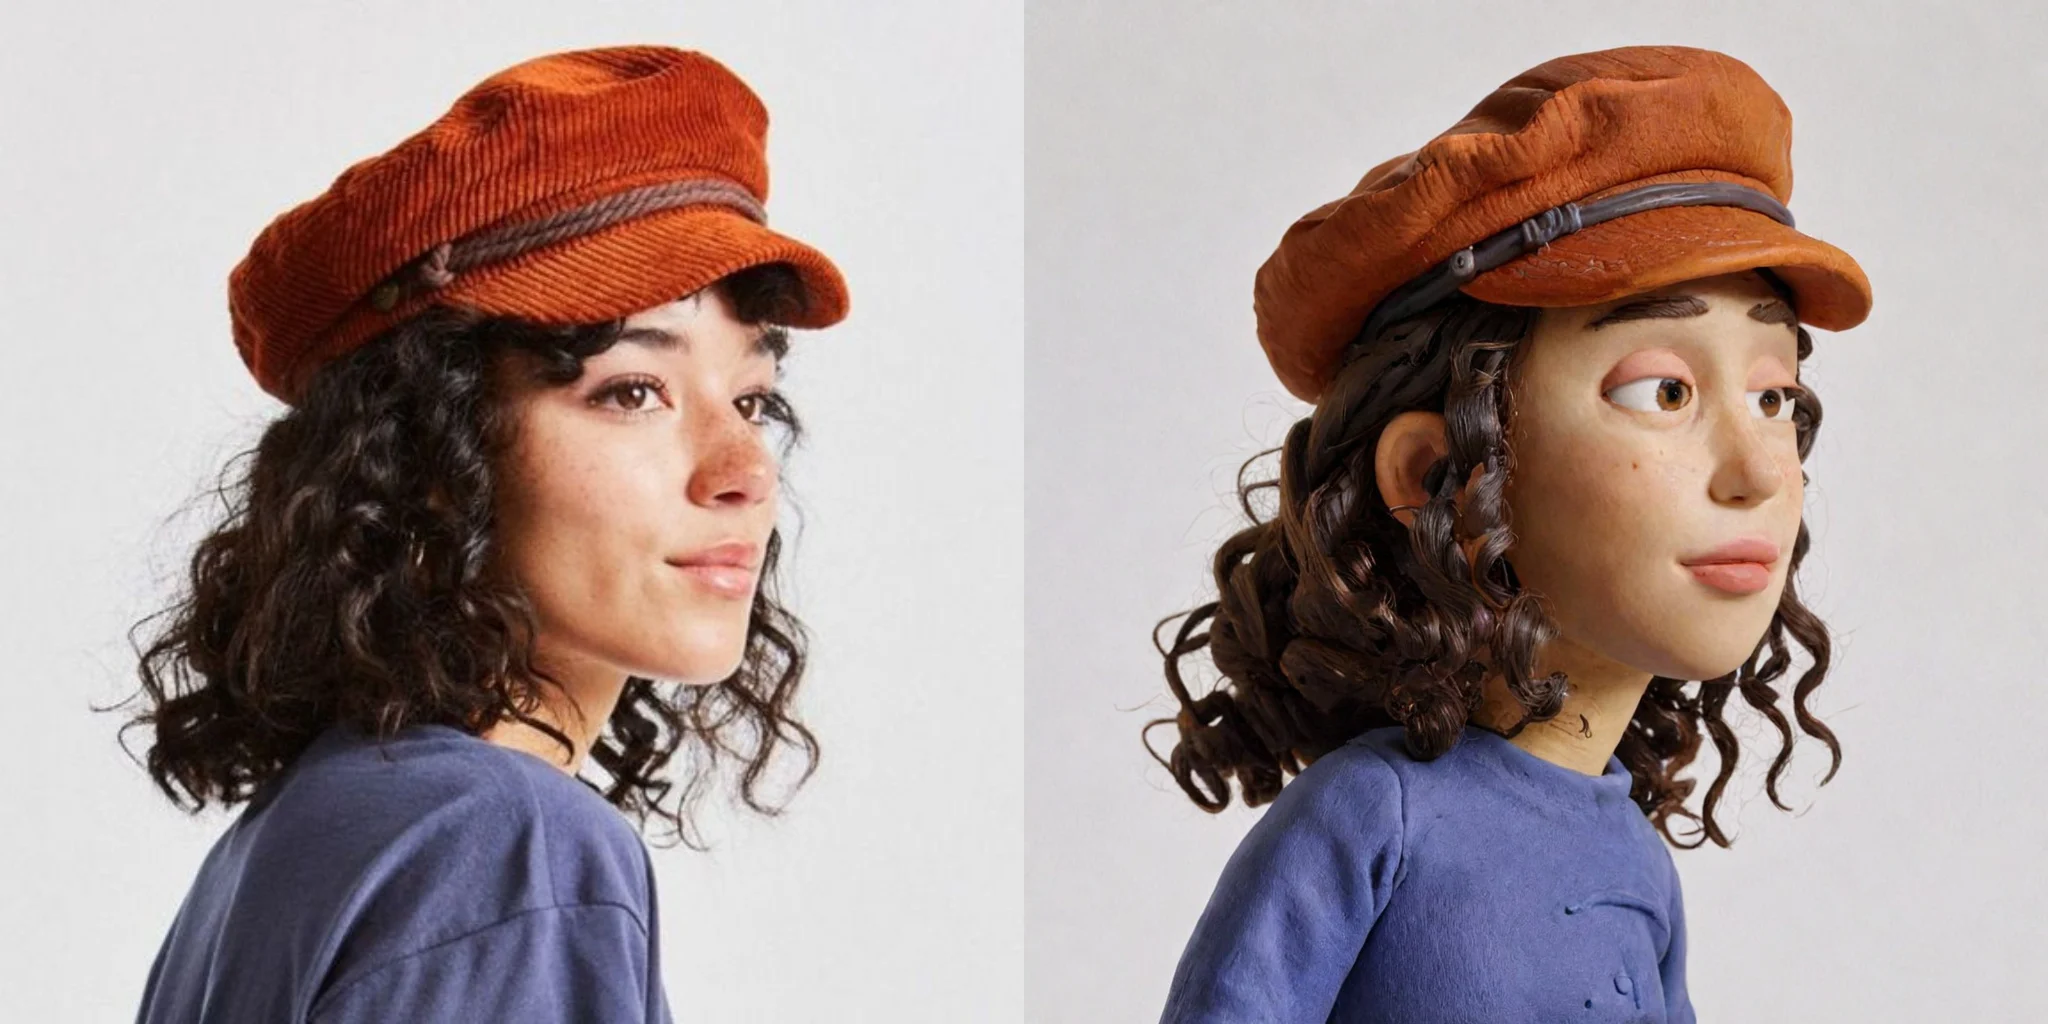
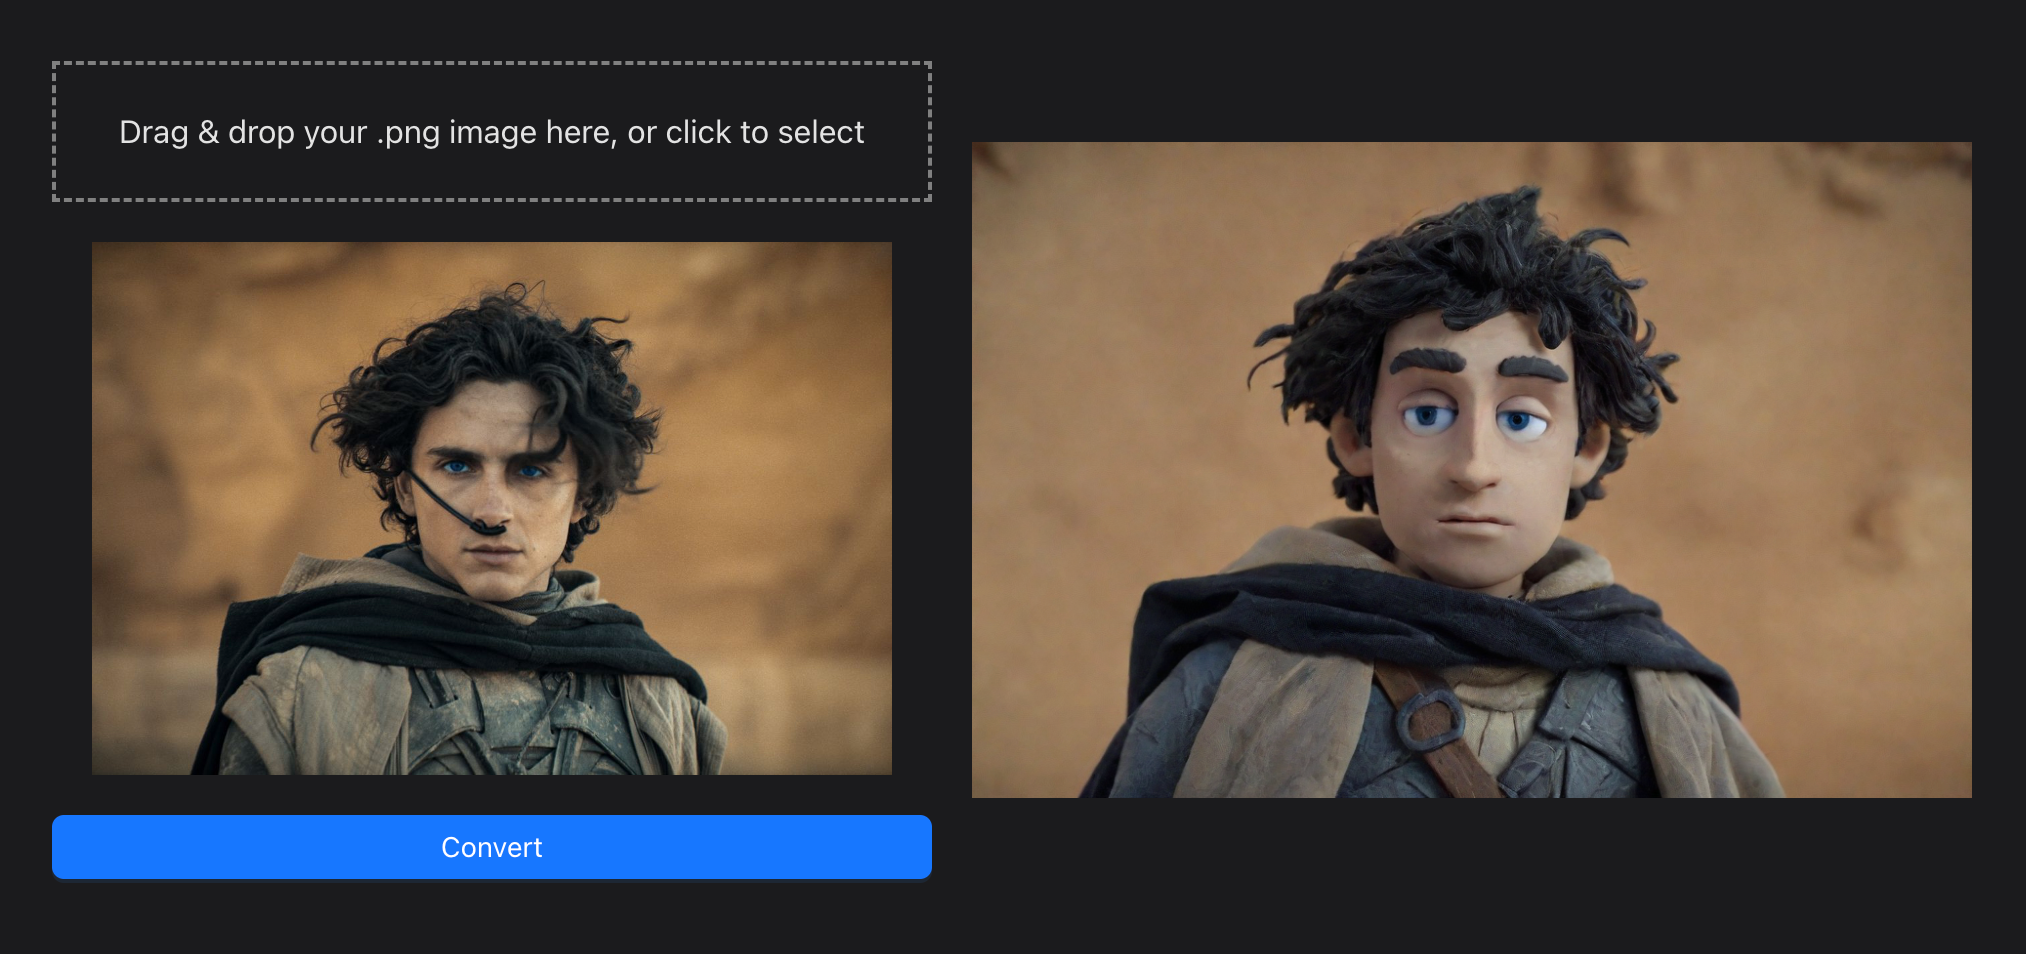
Generating Test Images with ComfyUI
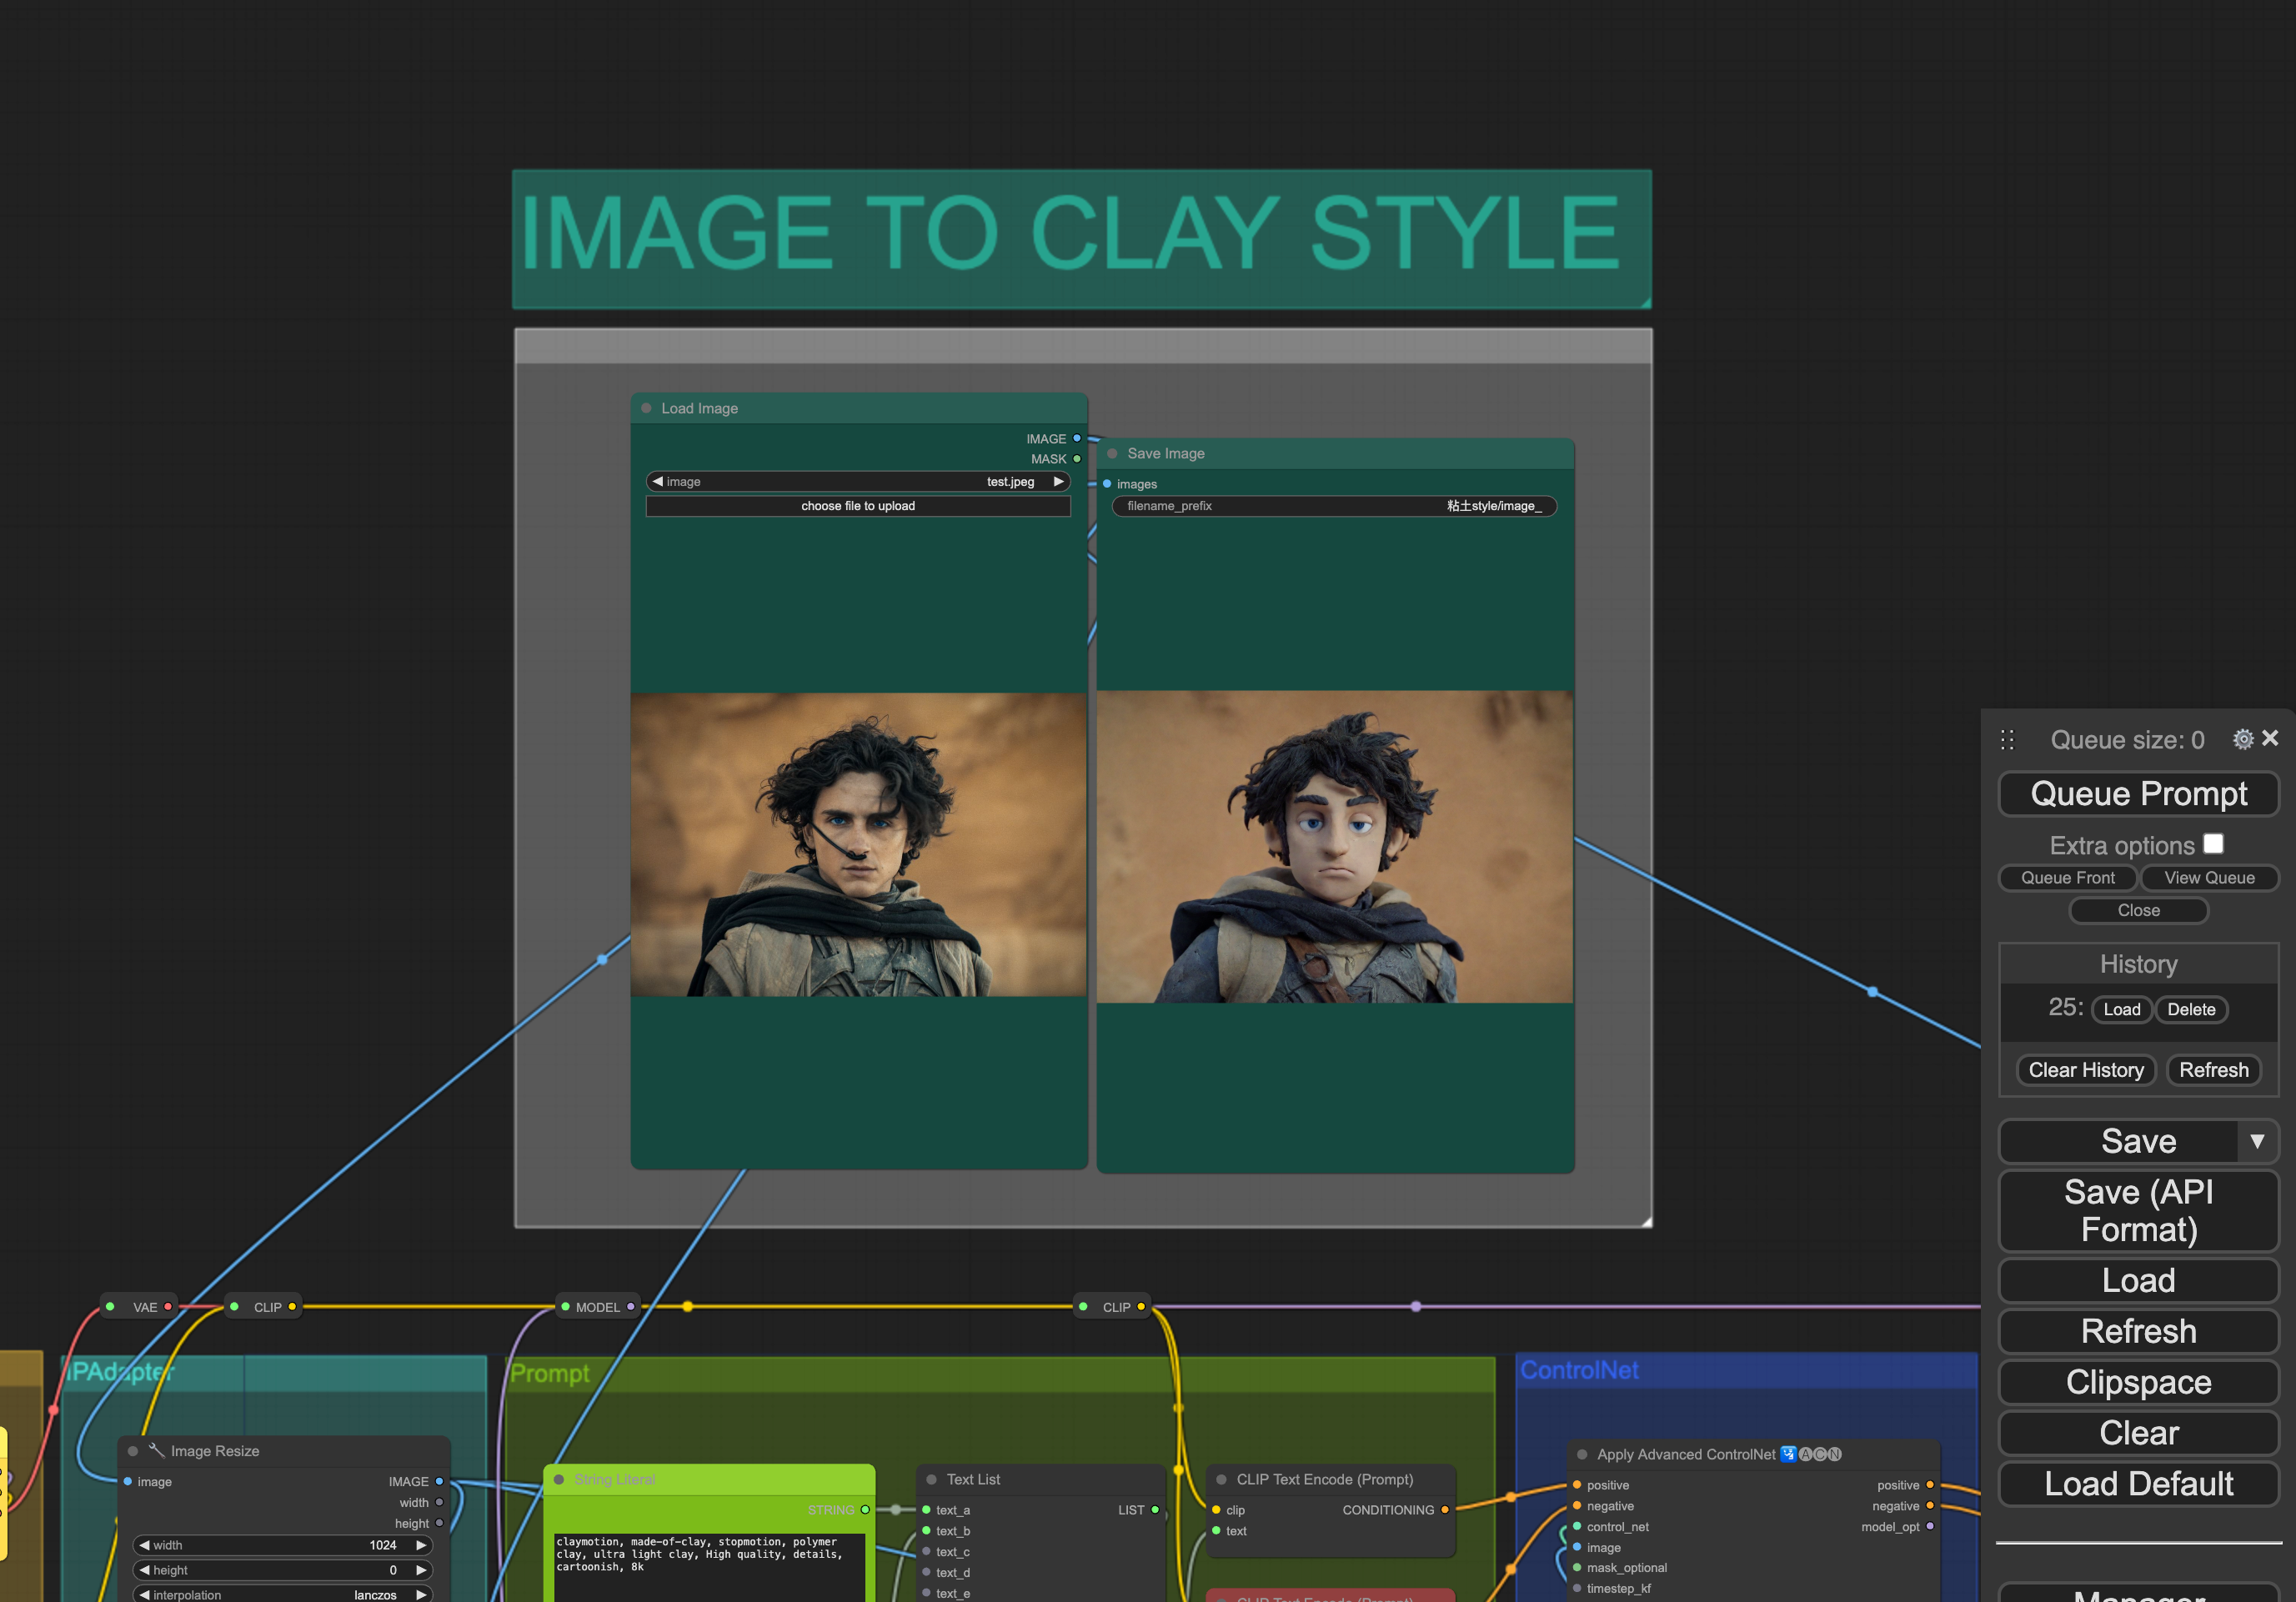
In the ComfyUI interface, you can view the clay style image display box at the top. To verify the deployment's success, perform the following steps:
- Click
choose file to uploadunder Load Image to upload the original picture. - Click the
Queue Promptbutton on the right to initiate image generation. - Wait approximately 5-10 seconds for the image to be generated and displayed on the interface.
If the image is successfully generated, it confirms that ComfyUI is fully operational.
Conclusion and Future Prospects
This session introduced the deployment of Stable Diffusion's ComfyUI on LooPIN's decentralized GPU cloud servers and provided a preliminary look at using the clay style model. Future sessions will explore more functionalities and applications of ComfyUI.
Updated at May 9, 2024